How to Add a Vendor
In QuickBooks, there are 2 main ways to add a vendor.
Method #1
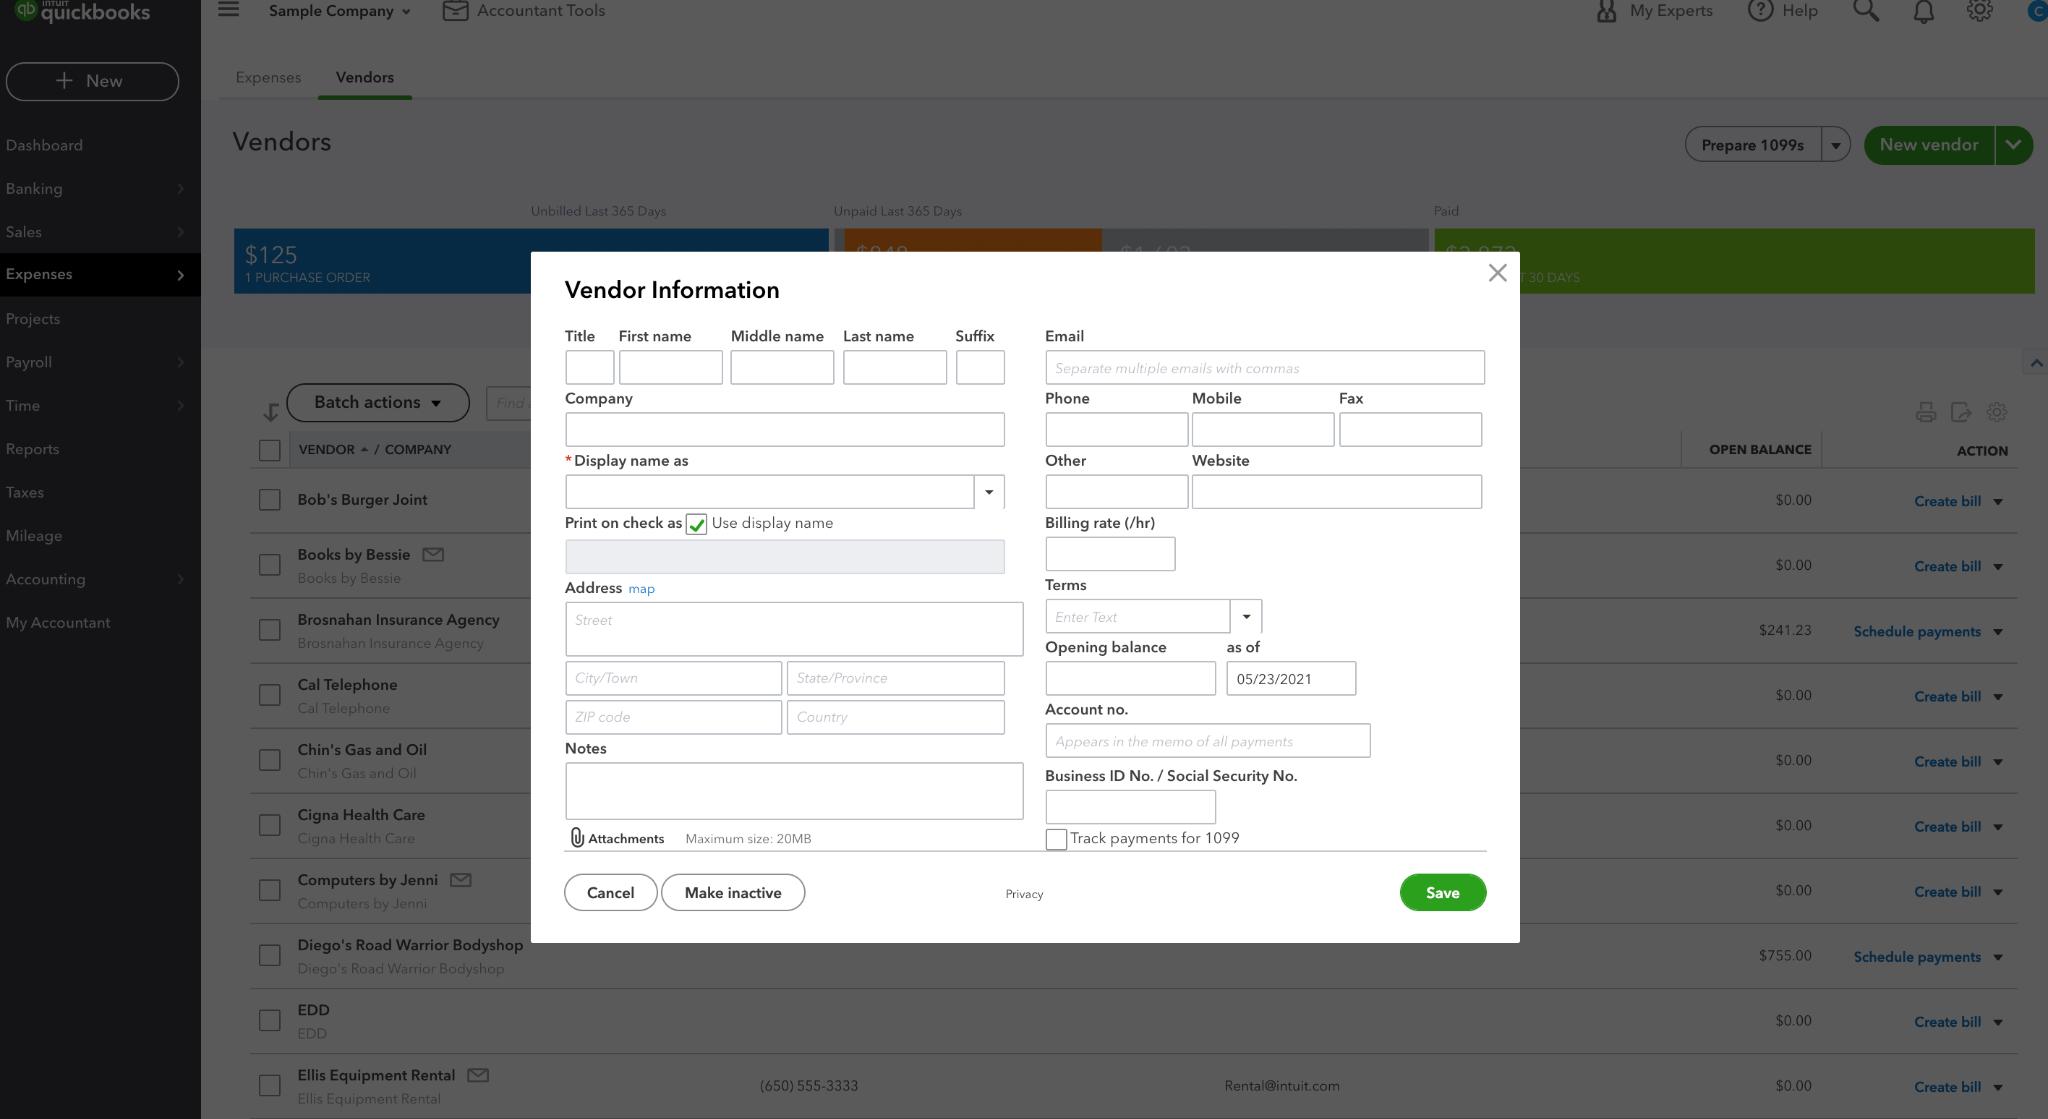
First, on the left sidebar, hover over Expenses and click on Vendors. This will bring you to the Vendors’ page. On this page, simply select the green New vendor button near the top right corner. Fill out as little or as much information as you see fit, but the only required box is the Vendor’s Name. Once the information is filled, select Save.

Method #2
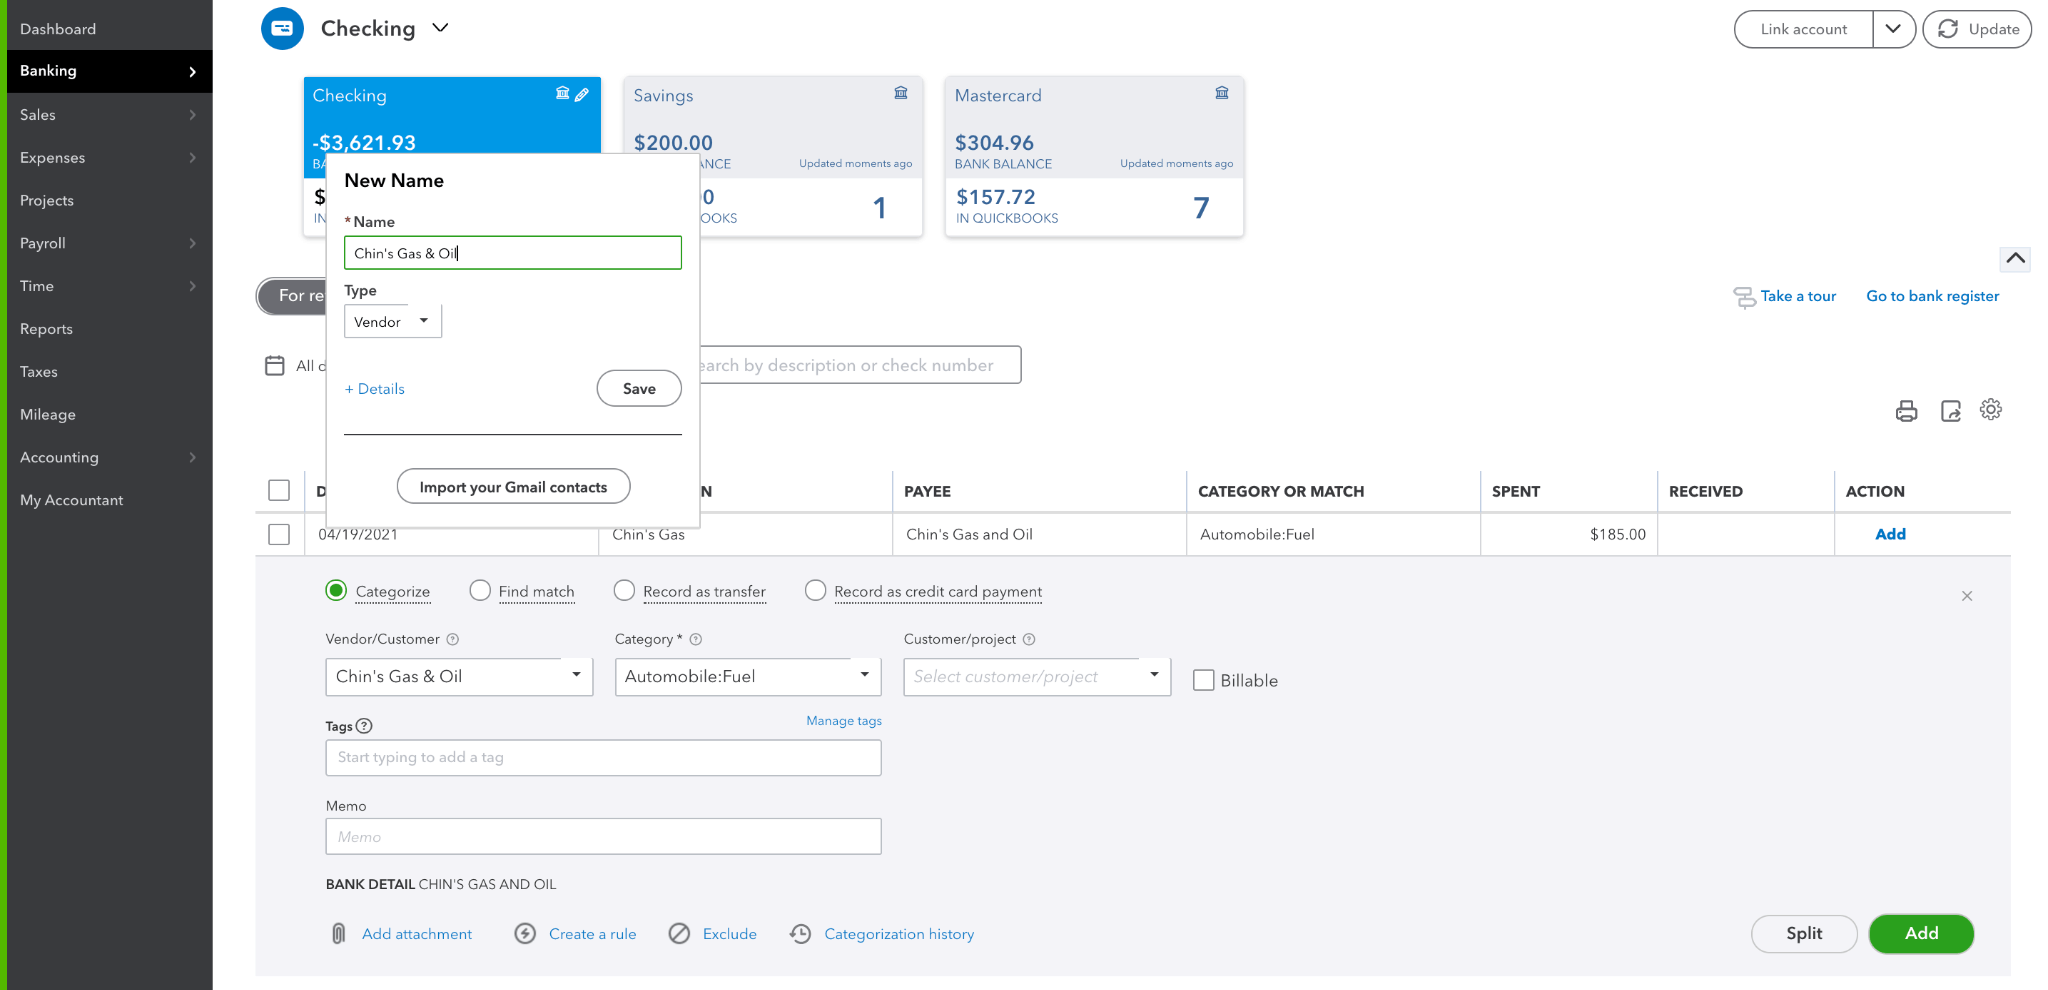
Another way to add a vendor is to do so within the expense itself. Let’s add “Chin Gas & Oil” as a vendor within the new transaction that came in on the Banking tab. Simply Type in the name of the vendor in the Vendor/Customer box, click Add Chin Gas & Oil, then the mini pop-up seen below will be shown. Make sure the name is correct and the type is set to vendor and click Save!


