How to Add a Personalized Expense Bucket in Quickbooks Online
Personalized P&L expense buckets are perfect for keeping your books organized and set up for your own needs. On the left side bar, hover over Accounting, then click Chart of Accounts. Another way to navigate to the Chart of Accounts is to use the following shortcut: CTRL + Option + A for Macs or CTRL + Alt + A for PCs.
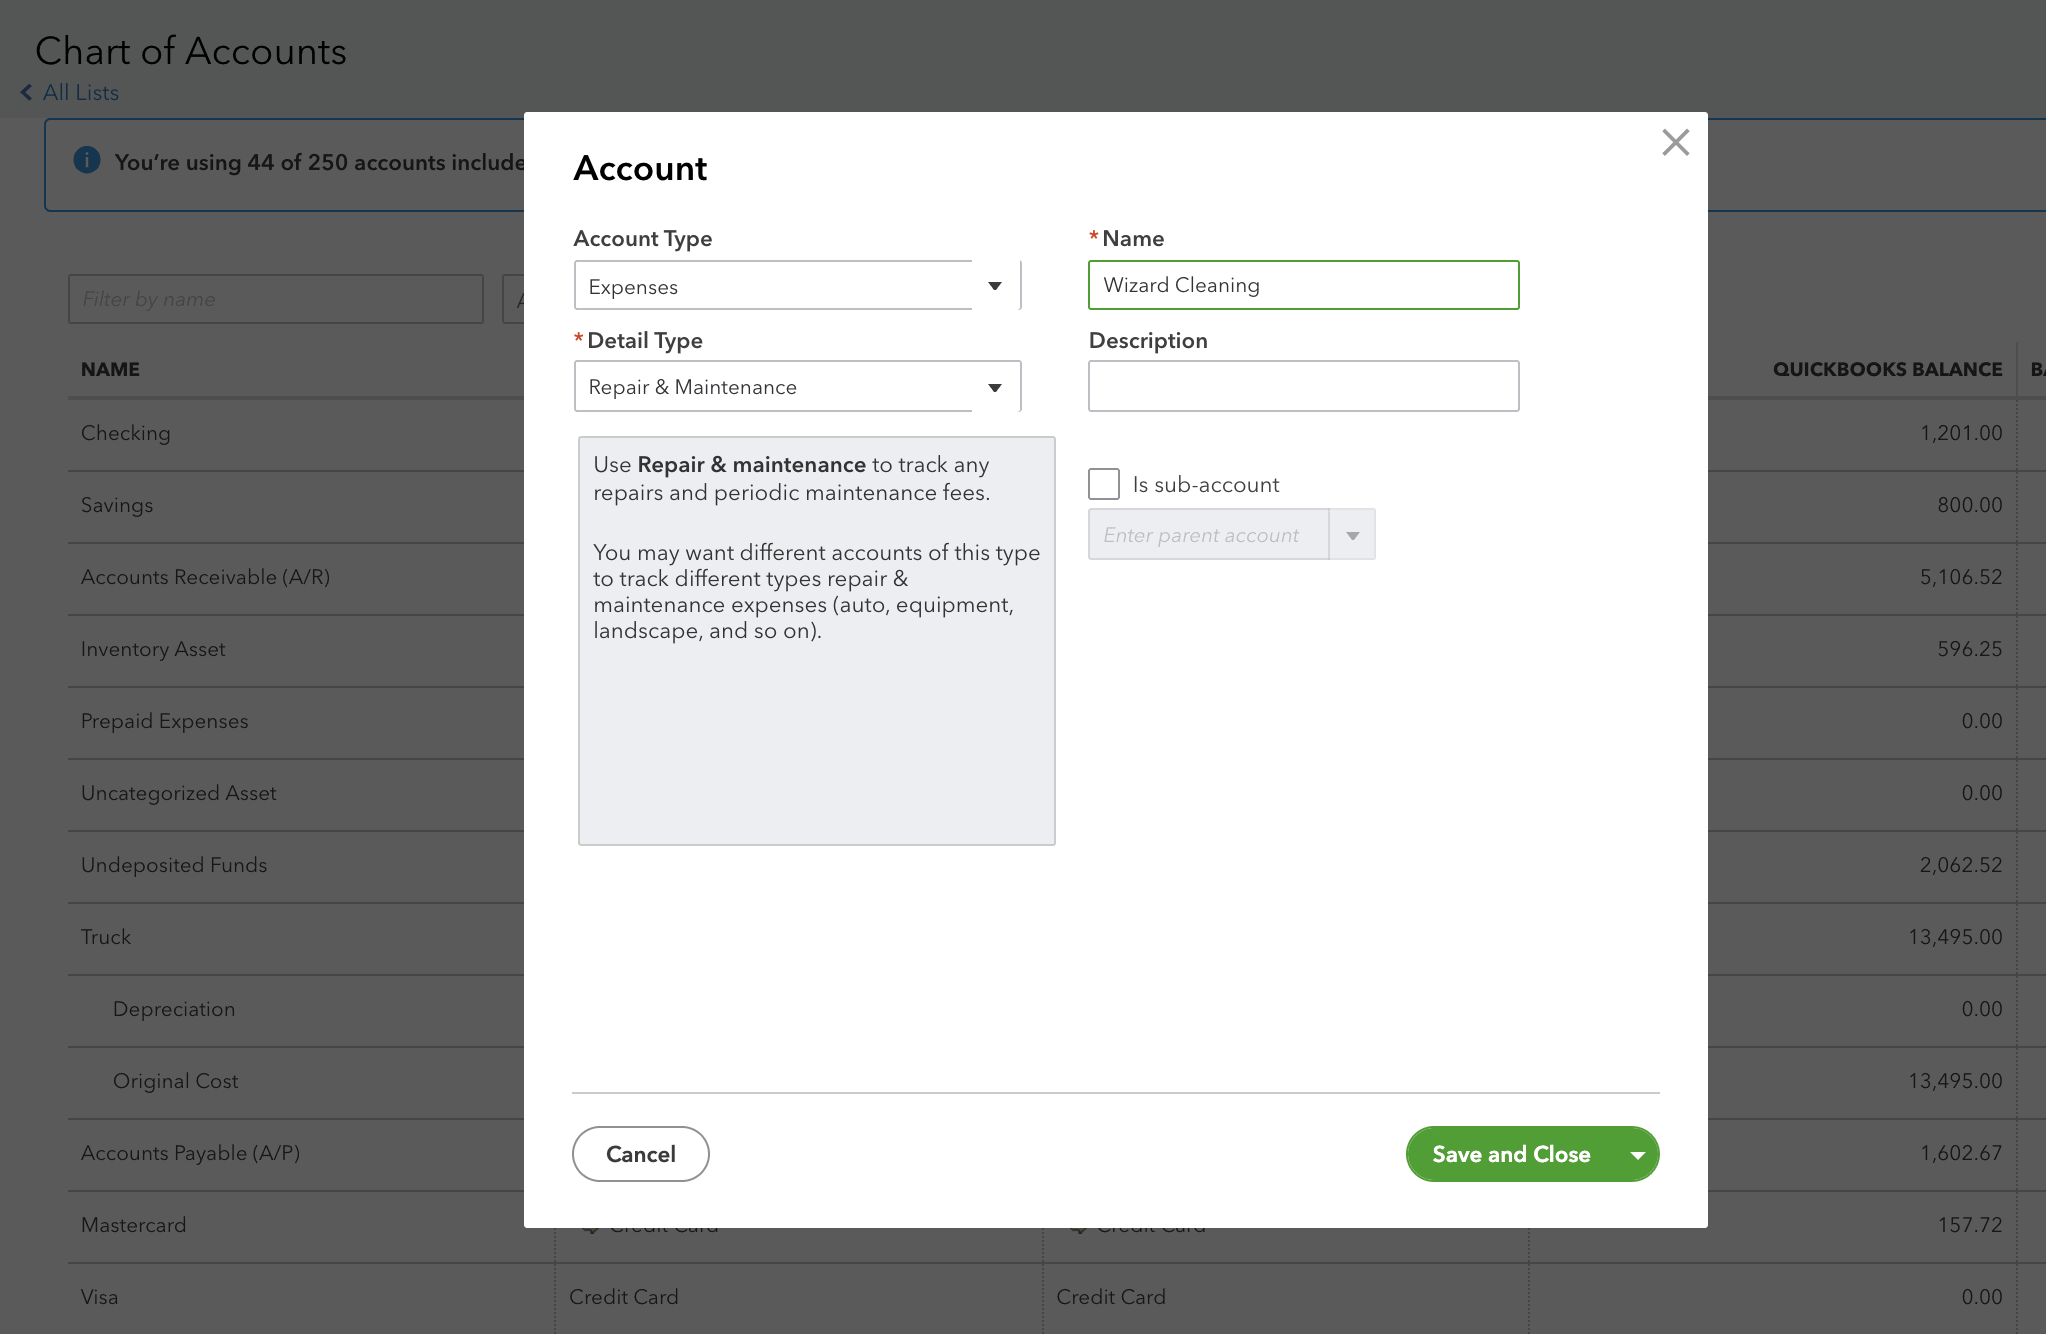
On the Chart of Accounts screen, click on New in the top right corner. We will be adding our own unique expense category called “Wizard Cleaning” since this company will be doing our weekly cleaning and we’d like to group all of these expenses in one place on the P&L.
Account type is Expense. Detail Type is Repairs & Maintenance and we will change the name to Wizard Cleaning. The completed template is shown below. Then, save & close.
Adding a Unique Expense Category in Quickbooks

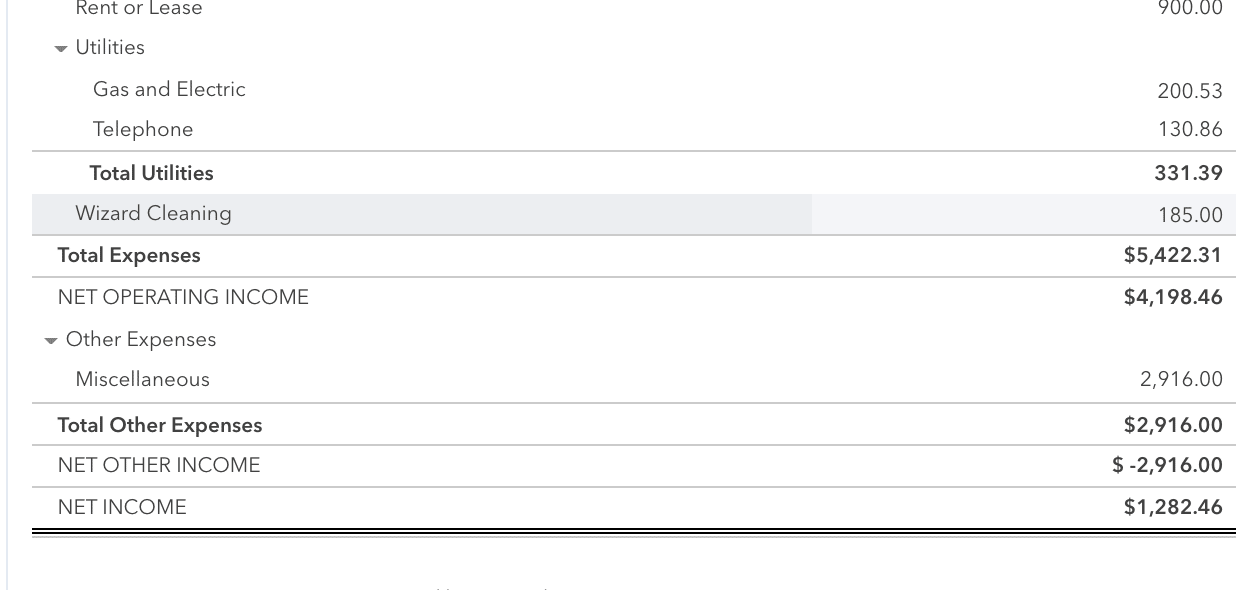
Now, when new charges for Wizard Cleaning enter on the Banking tab, we will categorize them to the Wizard Cleaning expense account. On the P&L, there will be an entirely new section for Wizard Cleaning so all expenses are in the same spot, as seen in the P&L snippet below:
Using the P&L Report to Track Expenses in Quickbooks

Now, we can quickly tell that we have spent $185 on Wizard Cleaning so far this year.


